41 how to make print and cut labels on cricut
How to create Pantry Labels in Canva for free - Cricut Print and Cut ... If you have been on Pinterest or Instagram at any point in the last few months, the pantry is becoming a work of art. But purchasing pre-done labels can be t... Print & Cut Label Tutorial in Cricut Design Space - Crafting a Family Take the printed page with the black border and place it on your mat. Load it in the machine with the "arrow" button, and press the "C" button to start the print and cut. When the images are cut, remove the mat and you will have beautiful stickers. Please let me know if you have any questions or if one of the steps is not clear.
How to Make Stickers on a Cricut - Jennifer Maker Materials to Make Stickers. View my Amazon shopping list with the exact items we used to make this project. White Sticker Paper. Clear Vinyl Sticker Sheets. White Vinyl Sticker Sheets. Printable Vinyl. Transparent Vinyl (optional) Sallim Font (optional) A method to print and cut your stickers - I used the Cricut Maker 3 but you can also use ...
How to make print and cut labels on cricut
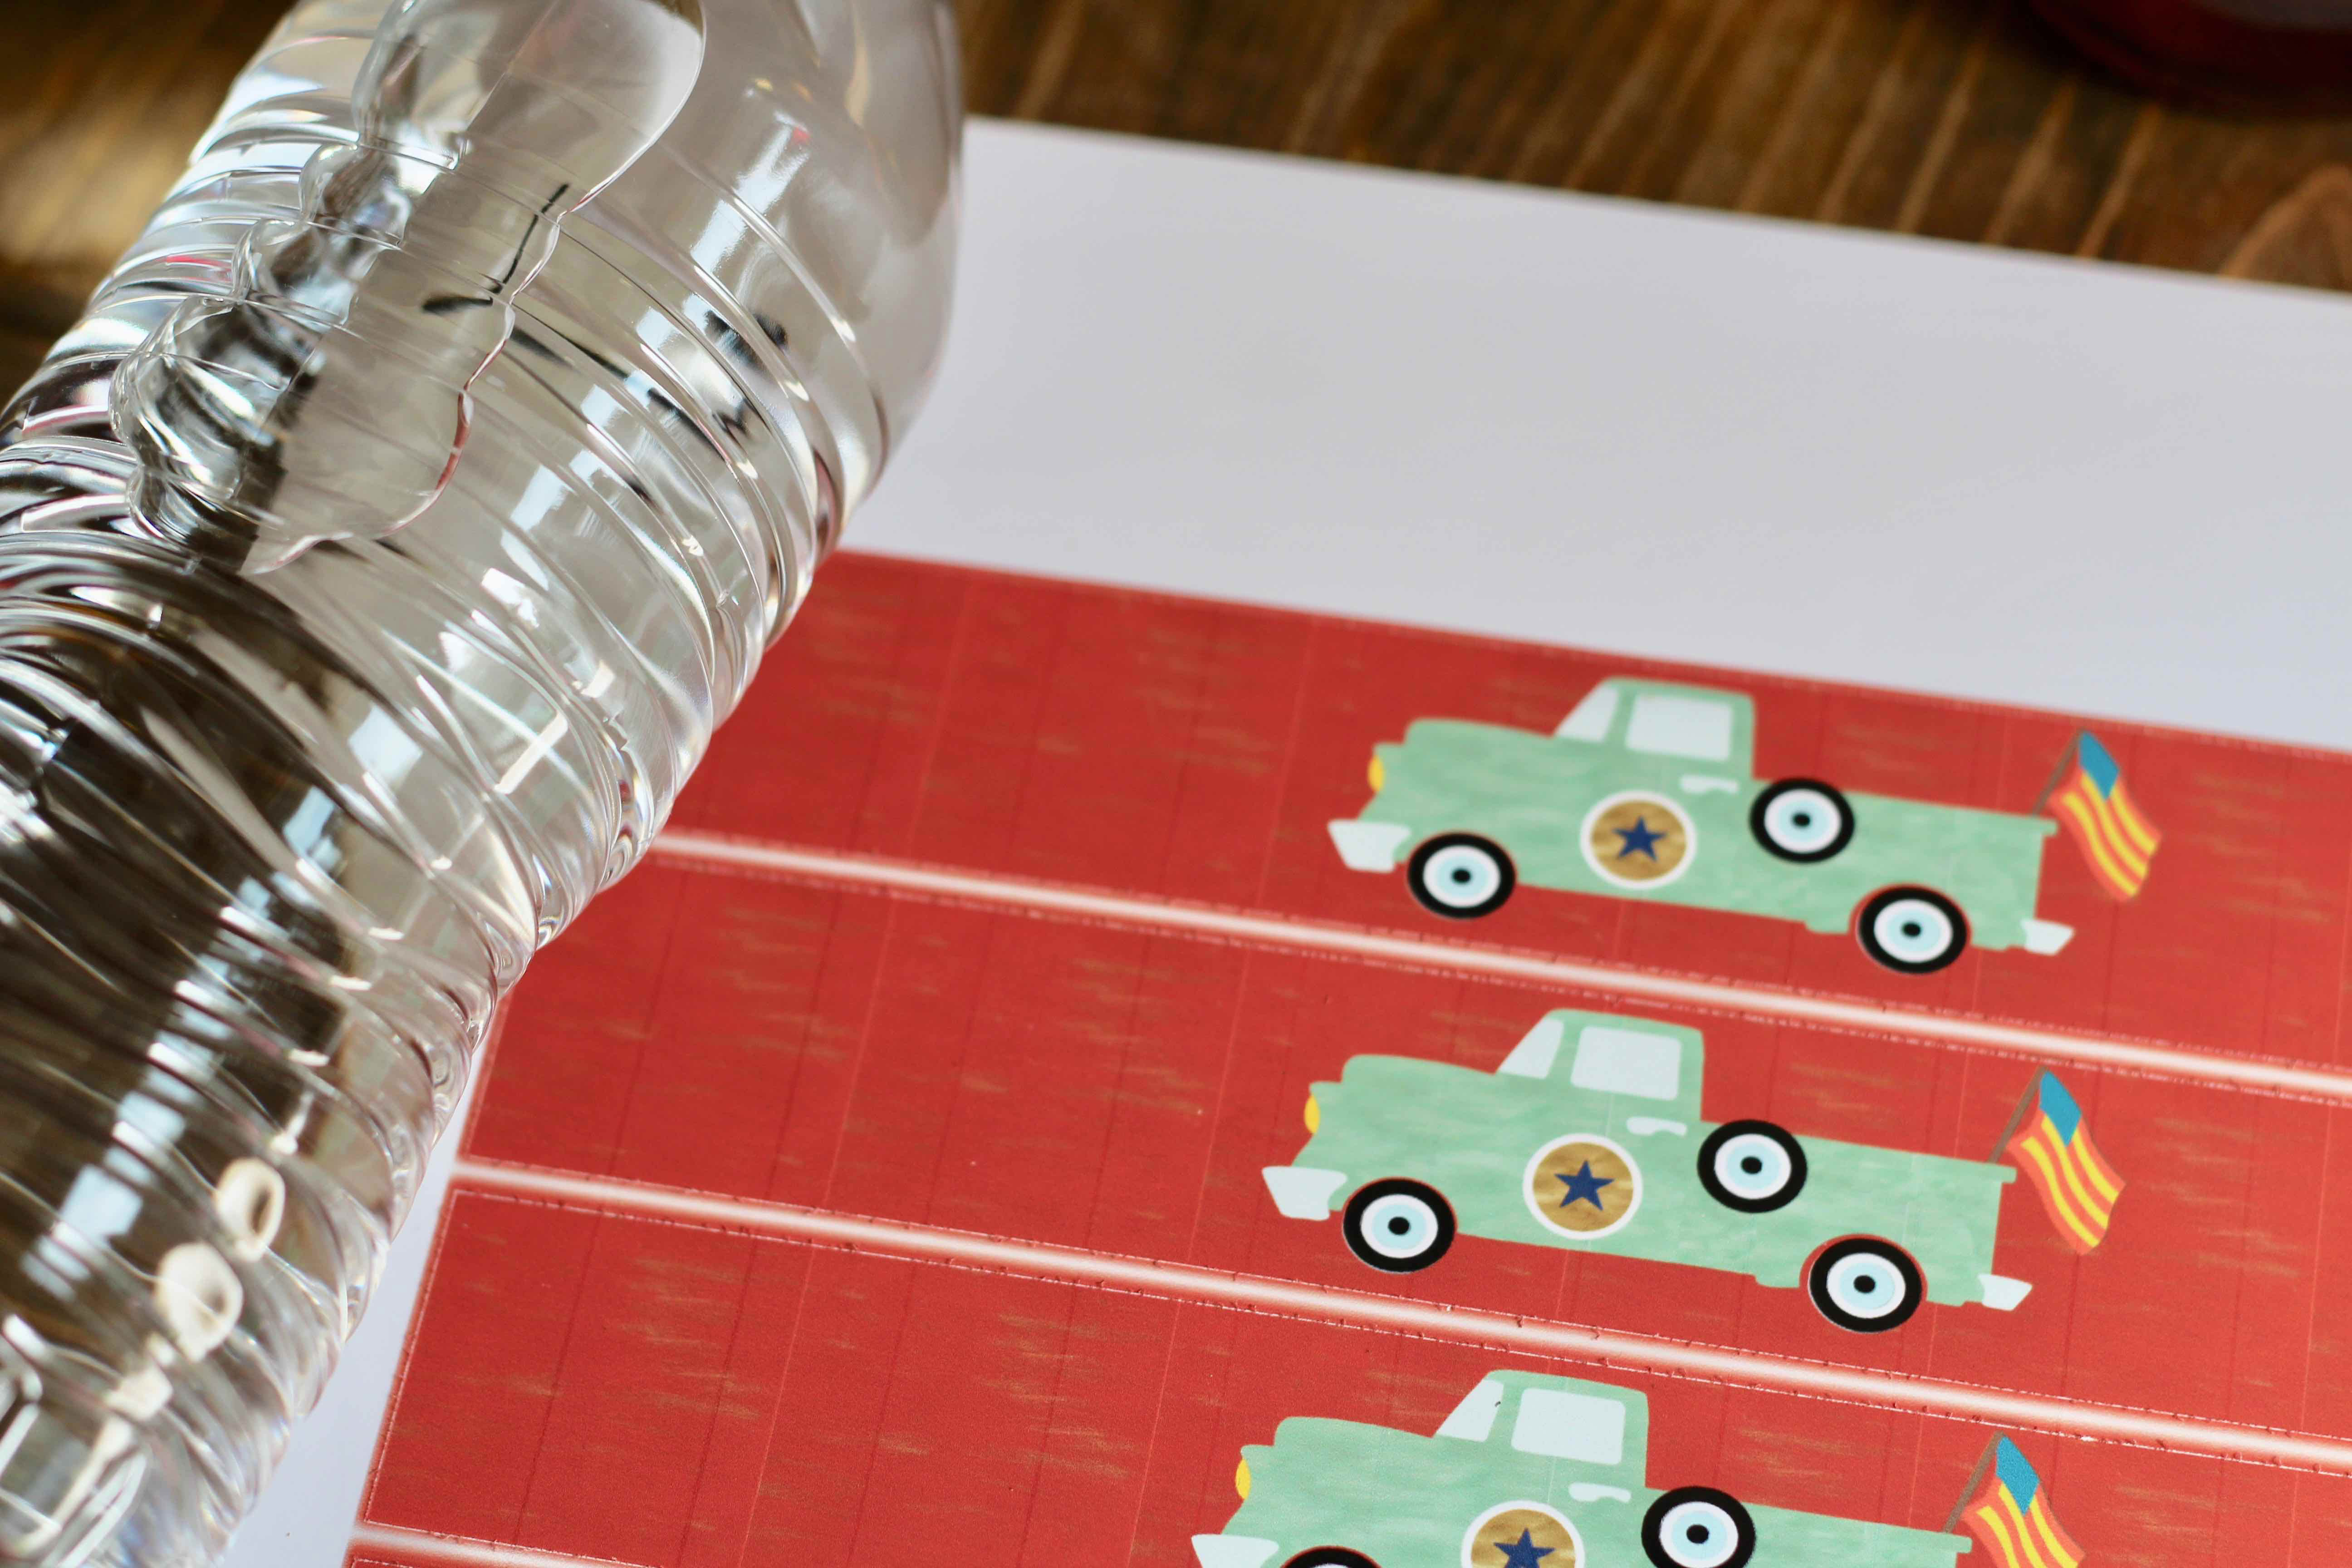
Printable Labels with Print then Cut on Your Cricut Machine Click flatten in the lower right-hand corner to make this a print then cut label and it is ready for your machine! Be sure to delete any labels you don't want to use before continuing. Step 3: Making Printable Decorative Labels with Print Then Cut Now it is time to use print then cut to actually make our printable labels. DIY Custom Water Bottle Labels with Cricut Print then Cut. Any color printer {If you do not have a printer, you can send to print and return to cut with your Cricut machine} Cutting mat [ blue or green] Tape measure to measure the water bottles. Waterproof glossy sticker paper. Matte sticker paper. Photo paper 30 or 32Lb . [If you use photo paper you will need a hot glue gun }. Easy Print then Cut Stickers with Cricut | Design Bundles Start by pressing the green Make It button on the upper right hand corner of the screen. This will start the cutting process and take you to another page. Step 18 - Continue to next page Click the Green Continue button on the lower right-hand corner of your screen. Step 19 - Send to Printer Click on the green Send to printer button. Step 20 - Print
How to make print and cut labels on cricut. How to Make Stickers with Cricut Print + Cut (2022) Step Six: Align, Attach and Rotate the Sticker Sheets. Select BOTH Layers and move the one on the right so its right side is at 9.25″ on the top ruler. Attach the Layers, and then in the Rotate box in the top toolbar type in 90. Select both, rotate , and size images. How do I Print Then Cut in Design Space? - Help Center Print the page using your home printer, then place the paper on the Cricut cutting mat and feed it to the Cricut machine. The machine will scan for the sensor marking then cut around the image with precision. Note: The maximum image size for Print Then Cut is 9.25" x 6.75" and the default material is 8.5" x 11". This cannot be changed at this time. Address Labels with Cricut - Crafting in the Rain Print then cut address labels Start by creating a rectangle that's 2.8 inches wide by .8 inches tall. Type 3 separate text lines. The first is your name. The second and third are your address. By keeping them as separate lines, they will be easier to space properly. Choose a font for your name. Print & Cut Label Tutorial in Cricut Design Space Sep 07, 2017 · Take the printed page with the black border and place it on your mat. Load it in the machine with the “arrow” button, and Press the “C” button to start the print and cut. When the images are cut, remove the mat and you will have beautiful stickers. Please let me know if you have any questions or if one of the steps is not clear.
Kitchen Labels, How To Print And Cut On Cricut Choose A Sticker Shape. Size Your Print And Cut Label. Now Create A Background For Your Label. Flatten Your Label. Add Text And Any Images. A Few Tips For Using Cricut Print And Cut. Other Uses For Printable Stickers. Inex. Making Kitchen Labels Via Print And Cut On The Cricut Maker. Complete Print Then Cut Cricut Guide - How to Make Stickers and More! When you want to Print then Cut something using your Cricut machine, it's key to setup the design correctly in Design Space. There are two things that you must make sure you do: You must switch the "Operation" option to "Print then Cut >> Standard" itch setting from "cut" 2. Then you need to click "Flatten" on the bottom right. How To Use Cricut Print Then Cut / DIY Labels and Stickers Hi guys! In today's video you will see how easy is it to use Cricut's print then cut feature to make labels. I use it today to make some labels for strawberr... how to print and cut labels on cricutの人気動画を探索しましょう | TikTok TikTokでhow to print and cut labels on cricut関連のショートムービーを探索しよう このクリエイターの人気コンテンツを見てみよう:Laura Tessari(@canadacrafts), Sade Porter(@sadecrafts_), Sade Porter(@sadecrafts_), threelittleferns(@threelittleferns), Melanie Marie(@melaniemakerxo), Joselyn Ann(@joselynann1), coeurdunpirate(@coeurdunpirate), Miranda Faiivae ...
Make labels with Cricut — Easy How-To Instructions with video — Cricut Make labels with Cricut Step 1 To design from scratch, click "New Project" on the home page of Cricut Design Space. Step 2 Once on the canvas, on the left-hand navigation bar, you'll see an option for "Images." Step 3 Click that button. You'll now be able to search in the Cricut image library! Online Labels® Sticker Paper Cut Settings for Cricut Maker We've tested the new Cricut Maker™ with OnlineLabels.com sticker paper to bring you our recommended cut settings for each material. Continue to the chart below to find the cut settings for kiss cut and full cut stickers. Materials were tested on a Cricut Maker with the fine-point blade. Make Sticker Sheets in Cricut Design Space | Design Bundles Step 8 - Cut Stickers Out. Once you have printed the stickers, you can start cutting them out using your Cricut cutting machine . Place the sticker sheet on your Cricut cutting mat and load it into the cutting machine. Continue to follow the prompts on your computer. Make sure to have your settings set to sticky note. Cricut Labels: 3 Ways to Make Them - The Country Chic Cottage Choose both objects and click flatten to make the label a print then cut. Repeat for as many labels as you need. Print when prompted in Cricut Design Space then add to your machine for the cutting. Peel and stick the labels once complete to any surface. Tried this project? tag us to show off your work!
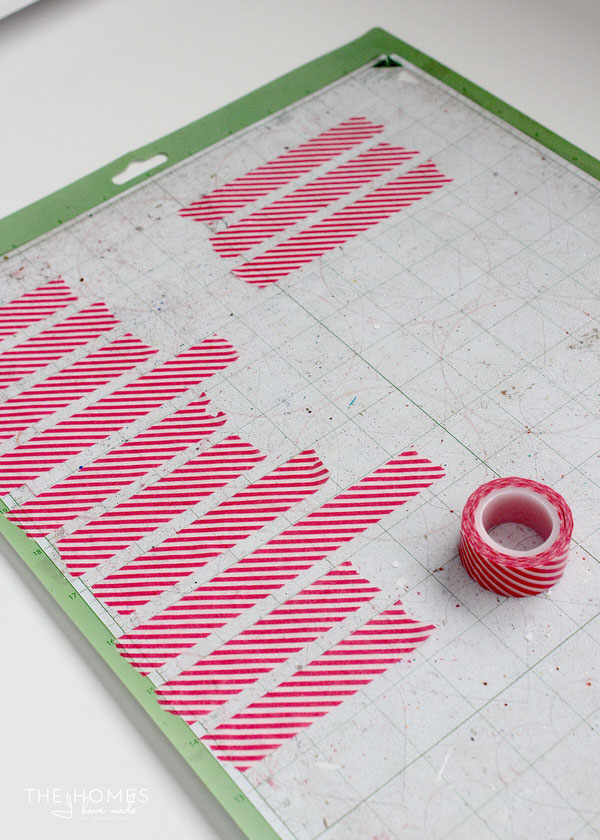
3 Creative Ways to Make Labels with a Cricut Explore | The Homes I Have Made
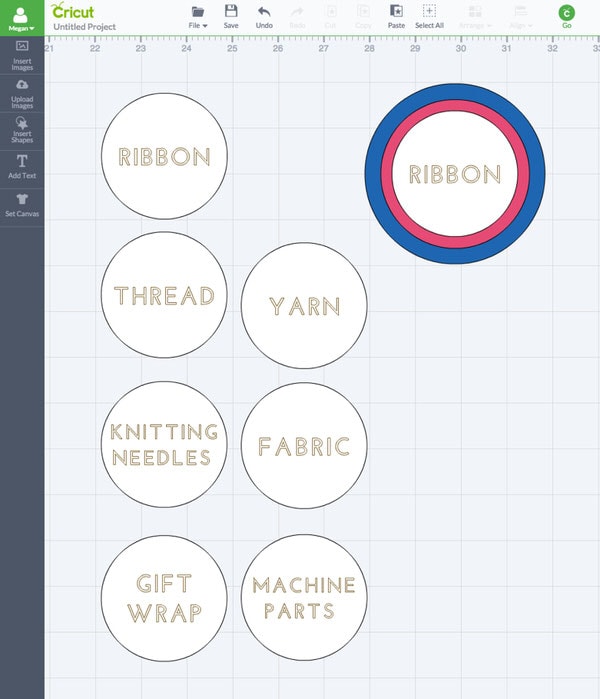
How to Make Vinyl Labels with a Cricut | A Comprehensive Guide Start by opening Cricut Design Space and use the search bar in the Image Library to find pictures for everything you want to label. Select images that are both simple in design and intuitive to understand. Notice the three images I selected below are not single color/layer images when I first place them on my canvas.
Free Cricut Label Templates - Pin by Muse Printables on Printable Patterns at ... - Older cricut ...
How to Print and Cut Round Stickers on the Cricut Go to Design Space at Click New Project Click the Upload button Browse, find, and upload the sticker file On the next screen, under "Select Image Type," choose Simple then click Continue. On the next screen, just click Continue. On the next screen, keep it selected as "Save as print then cut image" then click Save.

Free Cricut Label Templates - Pin by Muse Printables on Printable Patterns at ... - Older cricut ...
How to Print Then Cut with your Cricut - Daydream Into Reality After saving the images on your computer, log in to your Cricut Design Space and then click on the left panel area's "Upload" button. Then click on the "Upload Image.". When you do this, a new window will pop up asking you to locate the file on your computer. Search for the image and double-click on it to upload it.

Cricut Explore Essentials: How to Make Pretty Organizing Labels » Christene Holder
Easy Print Then Cut How to Create Stickers with your Cricut #cricut #stickers #printthencutSUPPLIES:Cricut Machine: Cutter, mats, tools: paper used: ...

How to make your own labels free cut files for cricut - YouTube
How to Make Stickers With a Cricut Using Print Then Cut and The Offset Tool To maximize the amount of stickers you cut, click on Insert Shapes in the left menu, and insert a square. Unlock the square's proportions by clicking on the little lock on the size menu at the top. Change the square's size to 6.25 X 9.75. Click on the Arrange tool in the top menu bar and send the rectangle to the back.

Cricut Explore Essentials: How to Make Pretty Organizing Labels » Keys To Inspiration
How to Make Vinyl Labels with a Cricut Cutting Machine Step 1- Gather your supplies for making vinyl labels. Cricut Explore Air 2 Cutting Mat Cricut Premium Vinyl (I used teal.) Weeder and Scraper Tools Transfer Tape Label Project in Cricut Design Space Step 2- Create your design. If you are using a Cricut machine, you can find my exact project in Cricut Design Space here.
3 Creative Ways to Make Labels with a Cricut Explore | The Homes I Have Made
A Guide To Making Labels with Cricut Print Then Cut Apr 28, 2022 · Your Cricut machine will first scan the registration marks (the black rectangle) around your labels, and then cut out the shapes with precision! Step 5: Apply Your Labels Once you remove the excess paper around your labels, you can simply peel them off the mat or paper backing (if using sticker paper) and place them wherever you need them!

Pin on Cricut print & cut/stickers etc...
How to Make Print then Cut Stickers in Cricut Design Space Create the sentiment. Search images for "Happy Holidays.". Select the image, and click "Insert Images.". This image has a shadow layer, but it is hidden by default. Click the eye to unhide it. Then resize the image to fit the sticker. Insert personalized text. Click on the Text button to create a text box. Select a font, and type in the ...

DIY: Make Your Own Clothing Labels : 5 Steps - Instructables
How to make labels with Cricut Nov 02, 2021 · Make labels with Cricut Step 1 To design from scratch, click “New Project” on the home page of Cricut Design Space. Step 2 Once on the canvas, on the left-hand navigation bar, you’ll see an option for “Images.” Step 3 Click that button. You’ll now be able to search in the Cricut image library!

Cricut Explore Essentials: How to Make Pretty Organizing Labels » Christene Holder
Easy Print then Cut Stickers with Cricut | Design Bundles Start by pressing the green Make It button on the upper right hand corner of the screen. This will start the cutting process and take you to another page. Step 18 - Continue to next page Click the Green Continue button on the lower right-hand corner of your screen. Step 19 - Send to Printer Click on the green Send to printer button. Step 20 - Print
Bendy Bacon Soup Labels Make your own Bacon Soup | Etsy
DIY Custom Water Bottle Labels with Cricut Print then Cut. Any color printer {If you do not have a printer, you can send to print and return to cut with your Cricut machine} Cutting mat [ blue or green] Tape measure to measure the water bottles. Waterproof glossy sticker paper. Matte sticker paper. Photo paper 30 or 32Lb . [If you use photo paper you will need a hot glue gun }.
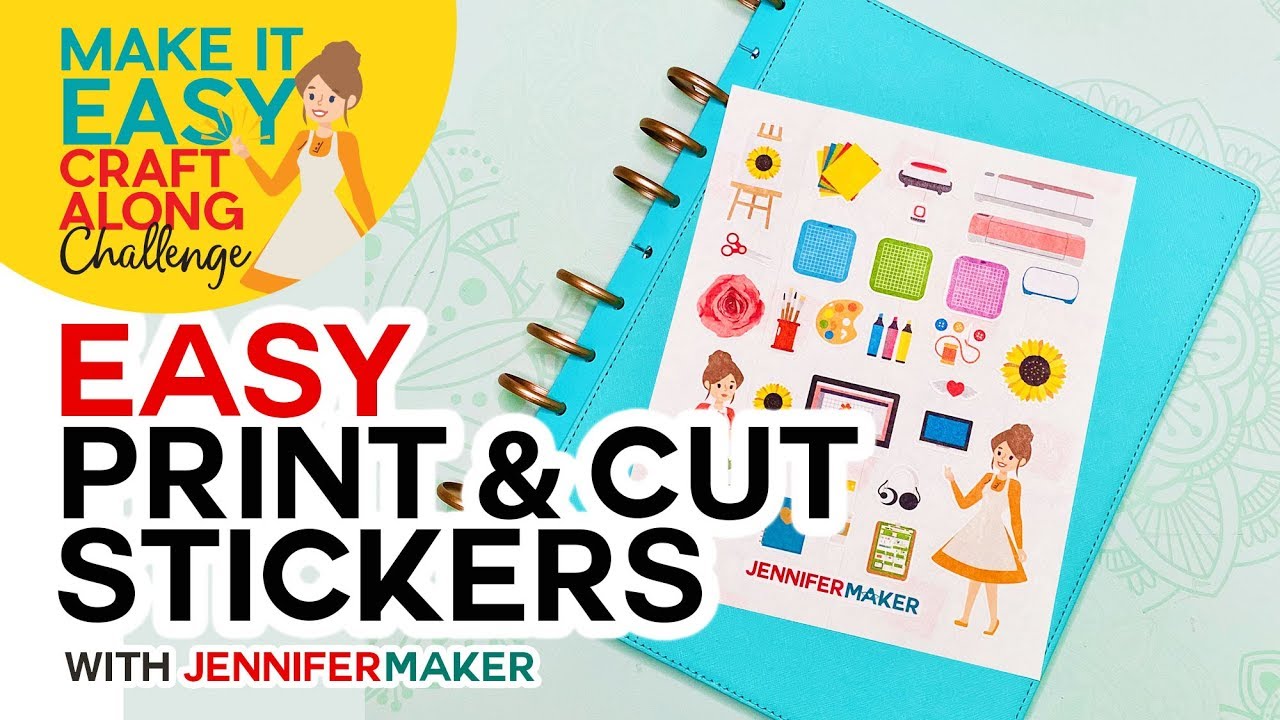
Easy Print & Cut Stickers on a Cricut! - YouTube
Printable Labels with Print then Cut on Your Cricut Machine Click flatten in the lower right-hand corner to make this a print then cut label and it is ready for your machine! Be sure to delete any labels you don't want to use before continuing. Step 3: Making Printable Decorative Labels with Print Then Cut Now it is time to use print then cut to actually make our printable labels.

Retta's Free SVG's: Free Full Bloom Rose SVG File

Print & Cut Label Tutorial in Cricut Design Space ~ Craftingafamily.com

Cricut Explore Essentials: How to Make Pretty Organizing Labels » Keys To Inspiration

How to Use Cricut Flatten to Make Foil Address Labels - Leap of Faith Crafting
The Perfect Printable Bottle Wraps For Your Summer BBQ (Tutorial) | Cricut
Post a Comment for "41 how to make print and cut labels on cricut"